
| 일 | 월 | 화 | 수 | 목 | 금 | 토 |
|---|---|---|---|---|---|---|
| 1 | 2 | 3 | 4 | 5 | 6 | 7 |
| 8 | 9 | 10 | 11 | 12 | 13 | 14 |
| 15 | 16 | 17 | 18 | 19 | 20 | 21 |
| 22 | 23 | 24 | 25 | 26 | 27 | 28 |
| 29 | 30 |
- Service Registry
- 아이오닉 설치
- Rest
- 도커
- docker isntall
- 아이오닉
- MSA
- api 서버
- ionic
- Service Discovery
- datasource
- Spring
- yml constant
- yml 여러개
- git
- 도커 설치
- spring constant
- docker
- Spring cloud
- spring boot rest api
- mariadb
- gitlab
- 다중 yml
- eureka
- multiple yml
- spring boot
- github
- CORS
- 16.04
- ionic install
- Today
- Total
개발 메모장
[Spring Boot] Rest API Server(2) - 서버 기본동작(get,post,put,delete) 본문
2020/08/08 - [Server] - [Spring Boot] Rest API Server(1) - IntelliJ 프로젝트 생성
[Spring Boot] Rest API Server(1) - IntelliJ 프로젝트 생성
최근 게이트웨이를 개발해야할 업무가 생기면서 기존에 크지 않던 API서버를 그대로 사용하기 위하여 MSA로 개발하기로 했다. 그래서 개발을 하고 있는 환경으로는 Spring Cloud Gateway + Hystrix + Spring
dlibs.tistory.com
앞에서 생성한 프로젝트의 GET, POST, PUT, DELETE 메소드를 지원하는 기본 서버를 만들어 보자
1. Application 환경설정

우선 resources 아래에 application.properties 파일을 application.yml파일로 변경한다.
두 확장자의 파일의 역할은 같다. 가장 큰 차이는 표현법의 차이다.
.properties
spring.application.name=rest-api.yml
spring:
  application:
    name: rest-api
두개의 표현법은 이렇다. 여기서 나는 가독성과 리스트, 주석 등의 이점을 살려 yml파일로 진행하기로 했다.
spring:
  application:
    name: rest-api
  profiles:
    active: dev

server:
  port: 8888

---

spring:
  application:
    name: rest-api
  profiles:
    active: prod

server:
  port: 8888
위 내용을 입력해 준다.
spring.application.name : application의 이름을 정한다. 향후 이 name 으로 eureka의 서비스가 등록되며 다른 서비스에서 이 이름으로 url을 찾아간다.
spring.profiles : profiles를 설정한다. ---를 기준으로 다른 profiles을 만들어 하나의 yml파일에서 여러개의 profiles 설정을 가져갈 수 있다.
server.port : 서버의 포트를 정한다. 입력하지 않는다면 기본값은 8080
여기까지 설정해도 서버가 동작할 준비는 됬다. Application을 Run하고 http://localhost:8888에 접속하면 아래와 같은 화면을 볼 수 있다.

2. GET, POST, PUT, DELETE 메소드 설정
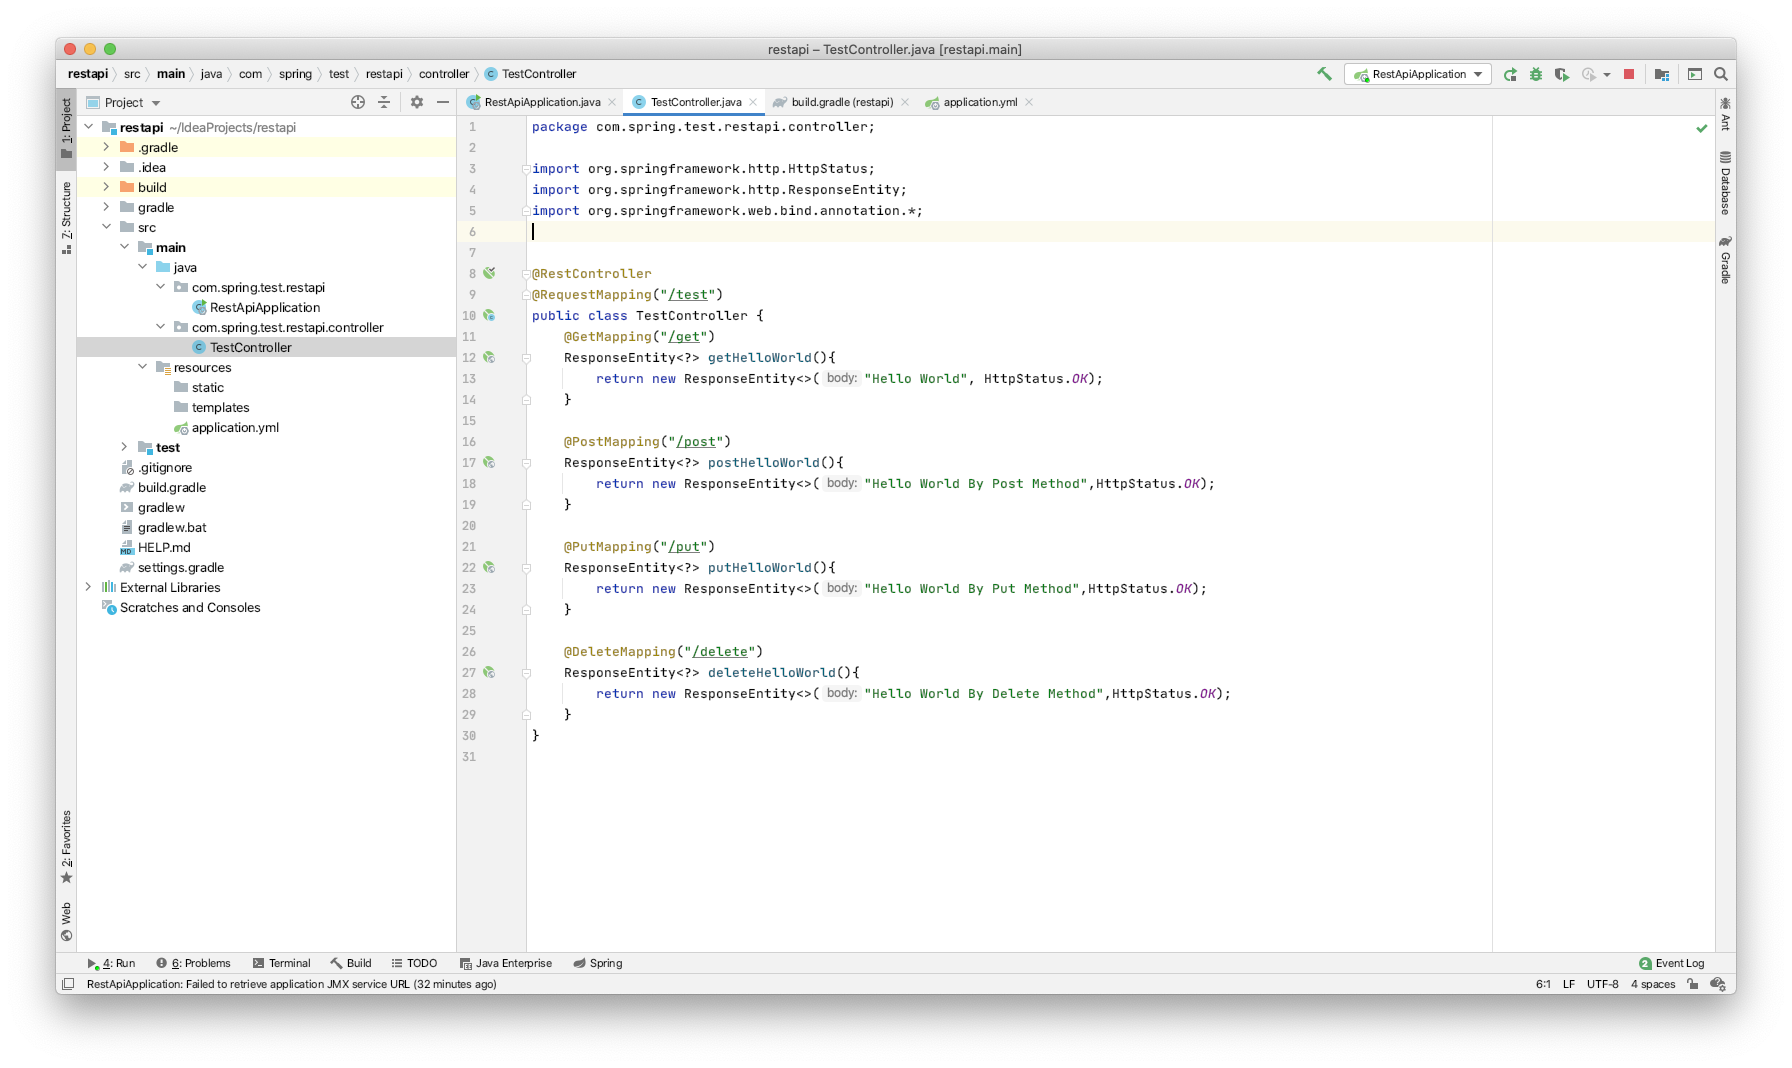
contollre라는 디렉토리를 만들어주고 TestController.class 파일을 만들고 아래와 같이 입력한다.
@RestController
@RequestMapping("/test")
public class TestController {
    @GetMapping("/get")
    ResponseEntity<?> getHelloWorld(){
        return new ResponseEntity<>("Hello World", HttpStatus.OK);
    }

    @PostMapping("/post")
    ResponseEntity<?> postHelloWorld(){
        return new ResponseEntity<>("Hello World By Post Method",HttpStatus.OK);
    }

    @PutMapping("/put")
    ResponseEntity<?> putHelloWorld(){
        return new ResponseEntity<>("Hello World By Put Method",HttpStatus.OK);
    }

    @DeleteMapping("/delete")
    ResponseEntity<?> deleteHelloWorld(){
        return new ResponseEntity<>("Hello World By Delete Method",HttpStatus.OK);
    }
}
-
@RestController : @ResponseBody를 지원하는 컨트롤러라는 의미로, return 시킨 ResponseEntity를 ResponseBody에 담아 반환한다.
-
@RequestMapping : 받은 request에서 contextPath 이후에 시작되는 path에 대해서 해당 컨트롤러로 mapping을 시킨다. 예를 들어 ("/test")는 localhost:8888/test로 시작하는 요청에 대해 해당 컨트롤러로 맵핑시키게 된다.
-
@GetMapping : Get 방식으로 호출된 리퀘스트에 대하여 맵핑한다.
그리고 http://localhost:8888/test/get을 호출해보자

그럼 위와 같이 나오는 것을 볼 수 있다.
3. Service
이재 데이터를 받기 전에 먼저 Service 디렉토리를 만들고 TestService 파일을 만들어 주자
Service는 requestBody 실질적으로 들어가게 되는 결과를 만드는 곳이다.

-
@Service : 컨트롤러에 반환되는 비즈니스 로직임을 명시한다
@Service
public class TestService {

    public String myName(String name) {
        if (name != null) {
            return "my name is " + name;
        } else {
            return "no name param";
        }
    }

    public String myName(Integer age) {
        if (age != null) {
            return "my age is " + age;
        } else {
            return "no age param";
        }
    }
}
그리고 Controller에서 service instance를 생성한다. @Service와 동시에 Bean으로 등록되어 Constructor에서 Parameter로 바로 받아 사용할 수 있다.
public class TestController {
    private final TestService testService;

    public TestController(TestService testService) {
        this.testService = testService;
    }
   .....
 }
4. Query String, Path, Request Body, Request Header
먼저 Requst Body 의 model을 만들기 위해 dto라는 디렉토리를 만들고 Info라는 모델을 만든다.

@Data
public class Info {
    String name;
    Integer age;
}
@Data : Lombok에서 제공하는 annotation으로 getter와 setter를 생성해준다.
서비스도 수정해줬다.
public class TestService {

    public String myName(String name) {
        if (name != null) {
            return "my name is " + name;
        } else {
            return "no name param";
        }
    }
    public String myAge(Integer age) {
        if (age != null) {
            return "my age is " + age;
        } else {
            return "no age param";
        }
    }
    public String myInfo(Info info){
        return myName(info.getName())+" / "+myAge(info.getAge());
    }

    public String myInfoWithRole(String role, Info info){
        return role +" / "+ myInfo(info);
    }
}
그리고 컨트롤러도 수정한다.
public class TestController {
    private final TestService testService;

    public TestController(TestService testService) {
        this.testService = testService;
    }

    @GetMapping("/get")
	ResponseEntity<?> getHelloWorld(@RequestParam(required = false) String name){

        return new ResponseEntity<>(testService.myName(name), HttpStatus.OK);
    }

    @PostMapping("/post/{age}")
    ResponseEntity<?> postHelloWorld(@PathVariable("age") Integer age){
        return new ResponseEntity<>(testService.myAge(age),HttpStatus.OK);
    }

    @PutMapping("/put")
    ResponseEntity<?> putHelloWorld(@RequestBody Info info){
        return new ResponseEntity<>(testService.myInfo(info),HttpStatus.OK);
    }

    @DeleteMapping("/delete")
    ResponseEntity<?> deleteHelloWorld(@RequestHeader String role, @RequestBody Info info){
        return new ResponseEntity<>(testService.myInfoWithRole(role, info),HttpStatus.OK);
    }
}
-
@RequstParam : query string 을 mapping 한다. require 옵션으로 필수값 체크를 할 수 있다. (ex. http://localhost:8888/test/get/name=kim)
-
@PathVariable : 해당 path의 값을 mapping 한다. (ex. http://localhost:8888/test/post/50)
-
@RequestBody : body의 담긴 객체를 mapping 한다.
-
@ReqeustHeader : 헤더 중 파라미터 명과 이름이 같은 header값을 가져온다.
이렇게하면 가장 기본적인 request에 대한 정보를 간단하게 mapping할 수 있다.
다음에는 JPA와 H2를 이용한 데이터 읽기 쓰기를 알아보자.
'Server' 카테고리의 다른 글
| [Spring] MySQL(Maria) DataSource 프로퍼티 (0) | 2021.05.01 |
|---|---|
| [Spring Cloud] Eureka Server / Client 구성하기 (0) | 2020.08.12 |
| [Spring] Multiple YML(Constants) 파일 관리 (0) | 2020.08.09 |
| [Spring Boot] Rest API Server(1) - IntelliJ 프로젝트 생성 (0) | 2020.08.08 |

